
Building a Simple Game using Unity
A technical deep dive into concepts involved in developing a fun game


Hi, this is Gergely with a bonus, free issue of the Pragmatic Engineer Newsletter. In every issue, I cover Big Tech and startups through the lens of senior engineers and engineering leaders. Today, we cover one out of four topics from last week’s The Pulse issue. Full subscribers received the below article seven days ago. To get articles like this in your inbox, every week, subscribe here.
Many subscribers expense this newsletter to their learning and development budget. If you have such a budget, here’s an email you could send to your manager.
Q: “I’m a software engineer and would like to build my first game. Which concepts should I be familiar with that are unique to game development?”
I’m back from summer vacation, and figured it would be interesting to dive back into a less “typical” topic, but one that is both a fun one and very familiar to many of us: games.
We covered Game development basics at a high level last year, in a previous article with Tommy Thompson – game developer, former university lecturer and director of AI and Games, and author of the AI and Games newsletter. In response, several of you said you’d like to learn more in a hands-on way and get into the code.
And so Tommy is back to tell us more about game programming in technical detail. I find it’s easier to learn concepts by using them, which is exactly what we do in today’s issue. Tommy explains the concepts behind GameObjects, Scenes and Prefabs and walks through how to build a simple game. Throughout, Tommy will point out similarities between game development and traditional software engineering: including how it feels like some parts of Unity “butchers” some object-oriented principles familiar from “traditional” software development.
In this article, we cover:
Introducing game engines. The concept of GameObjects, Scenes, Prefabs and Scripts.
Programming your own components. The importance of MonoBehaviour, how a frame is executed, threading basics, and implementing the player object we can move around with the “A,” “S,” “W” and “D” keys.
Building interactions. Using Prefabs to define coins; creating collision logic; the concept of triggers; debugging; and finishing the game so the player can collect the coins.
Structuring games with the MVC framework. Building games using the Model-View-Controller approach helps keep a clean structure, and will also help with debugging.
Leaning on your skillset. Having a background in “traditional” software engineering is a huge benefit for a game developer. With these basics, picking up game development is much easier.
Getting started. Resources to look to, to build your first game.
This article goes hand in hand with a tutorial in which we:
Create a new Unity project
Create a player object that responds to keyboard inputs.
Create coins of different value which players ‘collect’ by colliding with them.
You can follow the tutorial and create a simple game by downloading a version of Unity and Visual Studio Code, which are both free for personal use. To do the tutorial, follow instructions in paragraphs marked with: [Tutorial step]. Code scripts we go through can be found here.
As a heads up, Tommy is hosting his third annual AI and Games jam, 15-22 September. Over a week, participants build their own game utilizing AI in some form. Learn more or sign up if you’re interested.
With that, it’s over to Tommy.
1. An introduction to game engines
In my previous article, we briefly discuss the concept of a game engine. If you’re somewhat familiar with games, you may have heard game engines mentioned as a part of game development, and even marketing.
A game engine is a framework designed to support common functions, and provides a myriad of libraries to bootstrap development. This can include rendering for 2D or 3D graphics, physics and collision detection, networking, memory management, asset storage and streaming, ‘scene’ management (i.e. levels), artificial intelligence (AI) behaviour for non-player characters (NPCs), and much more.
Most games are built with an established engine by popular third-party providers like Unity, Unreal and CryEngine. Also used are proprietary engines owned by studios, such as EA’s Frostbite (Battlefield and FIFA), Ubisoft’s Dunia (Far Cry), and Snowdrop (The Division, Mario + Rabbids). These days, it’s rare a game is built using a custom engine, which is different to 20 years ago, when only a handful of engines existed as products to licence out to game studios.
Today, the Unity and Unreal engines meet most developers’ needs and many games are built in them. Studios seek to hire developers familiar with these engines, even if only to train them in their proprietary tools.
Which engine should you build with? This is an obvious question when starting a new project. The answer depends on which type of game you want to make, your target platforms, and your own – or the team’s – expertise.
Unity is increasingly popular with smaller teams and for single-developer projects built by one person, due to how easy it is to get started and iterate features quickly. Unreal has a steeper learning curve, but often produces slicker-looking games without much effort.
The pain points of Unity and Unreal engines differ greatly. It’s often said Unreal is a more practical engine for large AAA titles. Its creator Epic Games is a game developer which has shipped games for over 30 years, unlike Unity. What’s more, Epic Games has shipped games using its own engine since the Unreal series of 1998-2007, followed by the Gears of War franchise from 2006-2013. Since 2017, Epic Games has supported the ever-popular Fortnite.
Now, we’re going to dive into the practicalities of using a game engine. To help explain the fundamentals, we’ll implement a simple feature in Unity: a player avatar which collects items in its vicinity, and we also highlight specific aspects of the engine. You can follow along by installing Unity on your machine.
GameObjects
These are components of a typical game in the language of game engines:
Sprites for 2D graphics
Models and textures for 3D graphics
Physics elements like gravity
Sound assets
Light sources
Cameras for rendering
Code that facilitates specific gameplay features
… and more!
Naturally, working with so many things requires structure, as there can be millions of components in a game project. So we need to create a structure to navigate all these elements.
All game engines contain an identifier for an individual object. The only difference between game engines is the given name of this individual object. Unity uses ‘GameObject’. At minimum, each GameObject has three core properties:
Name: Objects always have a unique identifier. They may also carry a ‘tag’ so they can be grouped together with other GameObjects for easy identification.
Transform: The position in the virtual game space which the GameObject occupies. This is stored as a 2D or 3D vector, depending on the design.
One or more components: A component in Unity is an element that can be added to a GameObject to enable some kind of behaviour or interactivity. By default, all GameObjects need to have the Transform component.
Scenes are how collections of GameObjects are stored. In traditional video games, each level can be an individual scene. You can also have multiple scenes that load in and out of memory based on specific contexts, such as elements like the main menu or credits screen.
Prefabs are templates to create GameObjects at runtime and are useful for common GameObjects which are frequently used. An example of a Prefab is the coins in Nintendo’s “Super Mario” series.
GameObjects can also be built manually within the game editor (in our case, we use Unity as the game editor). You can also generate a GameObject directly via code. Just know that it’s often expensive in memory reallocation to generate or destroy a GameObject at runtime. This is why object pooling is a common tactic for maintaining game performance.
Starting a new project
[Tutorial step] Let’s begin by creating a new 3D project in Unity. Start with Projects → New Project → 3D (Core). The engine will create a new scene like this:
 comprising only a light and a camera")
We have two GameObjects: a Camera, and a Light source. Both are displayed in the ‘Hierarchy’ view:

Each is a unique object with multiple components which can be examined in the ‘Inspector’ window. For example, if you click on ‘Main Camera,’ you’ll see the ‘Inspector’ window on the right of the project:

Both the camera and the light source have its transform and properties bespoke to them. For example, the camera component has a perspective to render the game world from a specific viewpoint. The light-source component has properties to illuminate the world in a particular way.
Components are how a programmer interfaces with the game world to achieve specific operations or tasks. Traditionally, we’d expect our program to have an entry point (like a Main() function) that lets us kick off the execution of our startup code. This is how most UI-based programs are built.
However, our game engine – and the subsequent executable – handle this process while providing no mechanism to execute the code! Game engines often treat the startup of the executable itself as a “black box.” Only after the game engine starts up can programmers find ways to interact with it.
Scripts
For code to be executed in Unity, we create new classes using C#. These classes extend from the MonoBehaviour API. This allows you to hook into the execution logic of the game engine.
Scripts is the term the Unity community uses to refer to C# classes which interface with the engine. It’s a name that annoys me every time I write it!
Code needs to be attached to a GameObject as a Component, in order to be executed. The code you use as Components is either custom code, or you can use pre-built code shipped with the engine for commonly-used functions like handling lights and camera rendering.
We actually violate the core principles of object-oriented programming in order for our ‘scripts’ to work with the engine. Object-oriented languages operate under the edict that we build classes for the purpose of creating instances of them. When creating an instance, each object instance carries its own unique data and properties.
However, when working with Unity, only scripts (ugh!) derived from MonoBehaviour can be attached to a GameObject as a component. You cannot create an instance of a class that derives from MonoBehaviour in the typical object-oriented programming sense! Instead, you often create a class derived from MonoBehaviour, with the goal to solve a single purpose in the project. You do not instantiate this class because the engine does the instantiation automatically.
To make things more complicated, it is possible to have C# code execute that doesn’t derive from MonoBehaviour, but you still need that code to be instantiated within a MonoBehaviour-derived class!
This Unity paradigm causes problems for new and aspiring game programmers who lack experience in traditional software engineering. Such engineers develop a very weak understanding of how object oriented languages such as C# work, as they don’t use C# in the ‘traditional’ object-oriented way, but in the ‘MonoBehaviour’ way.
2. Programming a component: a moving player object
Having created an empty project, we now progress to creating a player object that responds to keyboard inputs. For simplicity, this player object will be a cube. It’s surprisingly easy to build this functionality! It’s only a few lines of code and modifying a handful of component classes.
The Unity engine is fantastic for prototyping and iterating. This is one of its real strengths; you can make something that ‘works’ in Unity quickly, by leveraging the engine's existing tools. Of course, the gap between prototype and product is vast. But for now, let’s focus on what our code will look like for a player to move on two-axis; the X and Y dimension.
MonoBehaviour and engine ticks
Frames and FPS (frames per second) is a key concept in how code executes in a game running at a certain “frame rate.” This means that within each second, the core game logic executes multiple times and each time the game logic and visuals update. For example, a game running at 60 FPS runs its core execution logic 60 times per second of gameplay.
Today, there’s much debate about framerate. Bethesda’s “Starfield” is under scrutiny for the Xbox version of the game running at 30fps, versus the PC version being capable of hitting 60fps. Elsewhere, EA’s “Star Wars Jedi: Survivor” was criticised for having an unstable frame rate on release.
High frame rate puts pressure on the hardware because it has to execute logic in shorter periods of time. If a game cannot run within an allocated time frame, the frame rate stutters in real time on the screen.
Sixty FPS means one frame needs to execute in around 16ms (milliseconds)! This is how much time the game frame has to complete, in order to maintain performance. It’s important to note that no two frames are the same. Managing frame rates is a huge challenge in the pre-release phase of game development, when developers try to optimise a game so the frame rate is as consistent as possible.
For our little game project, we want to capture user input from the keyboard in every frame. Then, we want to move the player avatar a fixed distance per frame at a predetermined speed. To do this, we create a new component script that extends from the MonoBehaviour API. This script allows us to interface with the game engine execution by using two lifecycle event functions that MonoBehavior provides:
Start() is the lifecycle event that is the first frame of the game in which the component is active. It’s only called once. Start() is useful for doing some basic initialisation logic.
Update() is called for every frame of the game that this component is active in. Update() is how you create execution logic in your game, adjusting to in-game events in every frame.
[Tutorial step] Let’s create a GameObject by going into the menu and selecting Game Object → 3D Object → Cube. Rename this object as ‘Player’ once it’s created.

[Tutorial step] Next, we create a new C# script (I know, the naming is confusing!) via the ‘Project’ panel on the bottom. Hit the ‘+’ button, choose ‘C#.’ We name this script ‘PlayerMove.’ Double click to open this file, which will open up Visual Studio that we’ll use for editing. In Visual Studio, we can see an empty class already provides the Start() and Update() functions:
 and Update() lifecycle events (functions) are created, but it’s down to us to define what happens in them")
More experienced C# developers will notice something that breaks ‘traditional’ C#, already. Our PlayerMove class inherits from the MonoBehaviour class, and MonoBehavior already defines the Start() and Update() functions. Because of this inheritance, PlayerMove should override the Start() and Update() functions. But there’s no override keyword! How can this be?
This is all an effort to hide the implementation detail, mostly for newcomers to the framework. Behind the scenes, all MonoBehaviour function calls are treated as delegates. The game engine uses reflection – modifying classes in runtime – on the game components to determine which MonoBehaviour functions a script has implemented. The game engine then registers these components as delegates for a central call at runtime. If all of this sounds weird, I agree! This approach can be computationally wasteful because all components have Start() and Update() methods by default, and Unity will execute them even when they’re empty.
Why would Unity “break” traditional C#? Outside of making the language easier to grasp for new developers, another rationale is that when Unity builds the final game it opts not to use the Microsoft Intermediary Language (MSIL) that C# often compiles down to. Instead, the Unity game engine translates the MSIL into C++ using the IL2CPP compiler. This compilation helps enable more cross-compatibility on different devices. However, by not using MSIL the compiled code results in an increased number of C++ cache misses, thanks to calling the parent implementation rather than the overridden one, which is another explanation for this reflection-based approach.
[Tutorial step] Back to the PlayerMove script. Let’s add some logic to move our player:
 and Update() method. See the entire file here.")
Let’s look at the code we added:
In Start() we log a ‘hello world’. This log will be presented in the game engine console.
In Update(), we pay attention to W,A,S,D key hits. We map these keys to movement along the X and Y axes. To move the GameObject, we apply the Translate() function on the transform property of the object. We move in a fixed direction (up, down, left, right) and multiply it against a fixed speed, as well as Time.deltaTime.
Time.deltaTime is the time between frame executions. This value is useful for any logic meant to operate constantly through time. By multiplying against a speed variable with a value of 5, we tell the game to move this object at a constant speed of 5 distance units per second.
[Tutorial step] Back to our project. Let’s drag this script onto the Player GameObject (our cube). When we press ‘Play’ at the top of the editor, the code compiles, and we can move this avatar around with the W, A, S, D keys:

Threading in game engines
Threads allow concurrent executions of program paths. How does threading work in a game engine? So far, our game logic is sequential, but for more advanced cases we’ll want to do parallel computations.
Unity is multi-threaded, but not thread safe. The engine has separate threads for things like physics, code logic and rendering. However, the ways you can interface with those threads are limited. We use lifecycle events like:
Update(): invoked when the frame executes.
FixedUpdate(): this runs as a separate thread with a consistent frame rate and execution window. FixedUpdate() is built almost exclusively for use in physics computations.
LateUpdate(): executing code at the end of a frame. This is great for updating the position and orientation of the camera to point it where the player moved earlier in the same frame.
Rendering and shader execution run in a separate thread within the game engine. Rendering means to generate a photorealistic image from a 2D or 3D model. Shading is a subset a rendering: the shader calculates the appropriate degree of light, dark and colour during rendering of objects. Developers can write their own shaders and inject them into the engine. Shaders can be written using scripting languages, or in-engine UI-based tools.
Running your own threads is possible, but risky. Attempting to run a standard C# thread will fail if the code in the thread accesses features of the Unity API. Due to this limitation, the common approach is to offload calculations to the thread in a way that’s safe for execution.
For example, if we try to transpose our movement code into a thread, we would have to remove any and all references to the GameObject Transform component, or the thread simply won’t run. An example makes this clear, so let’s refactor our code to delegate the movement code into its own thread:
 method kicking off the thread, and the MovePlayer() method running in it")
In this case, the refactor was largely pointless as we could only isolate the vector calculation to a separate thread. However, running separate threads for non-engine API calls is still very useful for many real-world cases, where you can improve performance by offloading various calculations to their own thread.
There are several other alternatives to using threads in Unity:
Corountines execute functions on a delay, though they actually run on the main thread. If you want to delay execution of some code, it’s often useful.
The Job system is relatively new to the Unity API, and allows the writing of simple, safe and multi-threaded code, so the application can use all available CPU cores to execute code.
The Entity Component System (ECS) is a completely different approach to writing in-game logic. It’s a data-oriented framework compatible with GameObjects, and is suitable for seasoned Unity developers to build more ambitious games by offering more control and determinism.
3. Building interactions: collecting coins with the player
We’ve built the basics of our player avatar, the cube. Now, let’s create coins for them to collect.
For this, we need to insert coin objects into the game space and figure out the collision logic between the avatar and the coins. Here’s what we want to build:
")
Building coin GameObjects with prefabs
Coins in our game are GameObjects which are critical to the gameplay’s function, and are used multiple times. This is a great use case to utilise prefabs.
A prefab is a GameObject that has been prepared and stored in advance (hence why it’s prefabricated). Preparing and storing in advance is useful for an in-game element like a coin because if we created each coin from scratch, it’d risk making mistakes or forgetting to add specific components. Our prefab stores all components and their corresponding parameter values for a single GameObject.
For our ‘coins’, we’re going to create a new GameObject. Our player is a white cube and the coins will be spheres. I’m stretching the definition of ‘coin’ here, to keep things simple.
[Tutorial step] We create a sphere by clicking on GameObject → 3D Object → Sphere. Give it the name ‘Coin’ and update the transform, so that it doesn’t have the same position as the player. The player is sitting at the world origin (0,0,0), so we move the coin to (5,0,0), by making this change in the ‘Inspector’ window, in the ‘Transform’ property group.
Also in the ‘Inspector’ tab, add the tag ‘Coin’ to the coin. This tag helps to easily identify when the player collides with it, so we can then decide how to react to that information.

[Tutorial step] We now turn this object into a prefab. First, we create a prefab in the ‘Project’ tab: hit the ‘+’ button (or right click → Create) → Prefab. Rename this ‘New Prefab’ to ‘Coin Prefab.’ Then, drag the coin object from the scene hierarchy onto the Coin Prefab. Give confirmation when a popup requests it.
Now, the prefab stores the same component data. Also, in the scene hierarchy tab the Coin is now marked in blue. This denotes it’s a GameObject derived from a prefab:
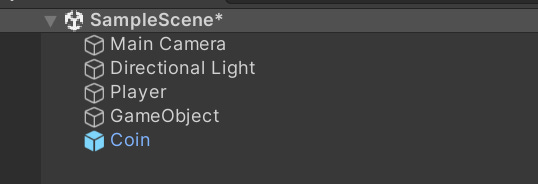
Side note: it would be equally valid to turn our player into a prefab, not just the Coin. If you’re creating a game with multiple scenes – for example, individual levels – then you’ll want the player to be stored as a prefab as well. Using prefabs saves you a lot of time and effort; it avoids reinventing the wheel for each new level!
We want each coin to have a different value. For this, each coin must store a reference to its own value.
[Tutorial step] We create a new C# class called ‘CoinValue’. In ‘Project’, create a new C# script called ‘CoinValue’. Drag CoinValue onto the Coin GameObject. Then open up CoinValue, and add the following code:

A coin randomly determines its own value on the Start() method – unless the coinValue property was changed from its default value of zero. We also add the value property, so we can retrieve it.
The above code highlights usage of the [SerializeField] attribute. Using [SerializeField] is useful in a couple of ways:
It exposes the value of the variable in the ‘Inspector’ window of the editor, so we can edit it.
The value we set is saved when the engine is closed.
By default, Unity serialises any variable declared as public. [SerializeField] is only necessary in the event your variables are private or protected.
When I taught game programming, many students routinely declared variables public, and did not embrace the good practice of encapsulation of variables – of being deliberate about which variables to expose. Even Unity's own tutorials often recommend simply exposing the variable, not explaining the benefits of using private variables, and using the [SerializeField] attribute for in-editor modification.
[Tutorial step] Let’s now add a couple of coins to our game. Just copy the Coin, and update the X and Y coordinates to space them apart:


Creating collision logic
If we play our game as it is, the player and coins can overlap one another. What we want is that when the Player overlaps the Coin, it is destroyed. This means we have to:
Configure all components so the Player object can collide with Coins.
Create code that dictates when we collide with the coin. We add the value of the coin to the total score and destroy this object, removing it from the scene.
Collider components dictate the virtual space an object occupies. By default, when creating objects, they have colliders attached: cubes come with a box collider, and spheres come with a sphere collider. You can easily change the collider size, or even use a different type of collider as needed:

When two objects collide, we don’t want them to physically impede one another. To avoid overlapping, let’s change the coin prefab so that the “Is Trigger” value is checked on the sphere collider. Making our coin a trigger means we can detect when the player collides with the coin, but the coin itself will not stop the player passing through it.

We now write code that determines how coin and player objects interact.
[Tutorial step] Create a new C# Script called CoinCoillder.cs. This class will be added to the player GameObject, and is designed to detect whether the player hits with another collider in ‘trigger’ mode, and to handle the rest of the logic. We use the following code in this class:

Let’s look at what this code does:
RequireComponent: this attribute automatically adds the components specified to the GameObject to which it’s attached. This is a handy attribute. In our case, it ensures the collision works, and prevents null reference exceptions occurring as we try to get the coin value.
Rigidbody: For objects to collide, we need a Rigidbody component. Rigidbody allows an object to be affected by forces, and to interact in a realistic way with the environment and other objects.
OnTriggerEnter: this method is invoked when the player object collides with another collider in ‘trigger’ mode. In this method, we check if the other object has the ‘coin’ tag – which is why tags are useful. We add the value of the coin to our CoinCounter, and destroy the coin object.
[Tutorial Step] Drag the CoinCollider script onto the player GameObject. From now on, the onTrigger() method will be involved every time the player collides with an object whose “Is Trigger” property is set to ‘true’; that is, our coins!
Reading the code above, you’ll note we also snuck in a reference to another class that we haven’t written yet. The CoinCollider expects another component called “CoinCounter” to be added to the player GameObject.
[Tutorial Step] Create a new C# script called ‘CoinCounter’, and add the code as shown below:

This code keeps track of the player’s score. The initial score is zero and is incremented by the CoinCollider class.
[Tutorial step] As a final step, when running the code, we need to turn off gravity for the player. Select the player prefab and untick ‘Use Gravity’ on the Rigidbody component. If we run the code with the default setting – ‘Use Gravity’ turned on – the player would be in freefall, as by default GameObjects with RigidBody attributes are subject to gravity:

When we run the code, collisions now work, and in the console log, we see the total score logged.
 colliding with the coins (spheres)")
Congratulations! If you followed the tutorial steps, you have now built a game. We have a system in which a player collects coins.
Looking again at the CoinCollider script, we actually ask the coin its value, then add it to our total and destroy the coin GameObject at runtime. Note that destroying the coin doesn’t destroy it from the scene file itself. When we stop playing, the coin returns to its original place.
If this was a production game, we would be more conscious of pooling objects. For performance reasons, we would probably just disable the coin, and return it to a coin pool so we can re-deploy it later. Creation and destruction of gameobjects is expensive, given the need to (de)allocate chunks of memory at runtime. Larger numbers of objects being created or destroyed at runtime can have a significant impact on the all-important frame rate and performance.
If you want to debug the code, this is possible within the Unity engine. You can set breakpoints in Visual Studio – or Visual Studio Code – as with any project. In order for it to work, you have to connect the Visual Studio instance to the game engine.
By installing Unity, it should configure the necessary plugin for interfacing with Visual Studio. For Visual Studio Code, you need to install the Unity plugin and follow the steps to debug, as described here.
Within Visual Studio, you can connect a debugger in two ways:
Via the ‘Attach to Unity’ button on the top ribbon.
Or via the menu using Debug → Attach Unity Debugger


Once you’ve set Visual Studio to Debug mode, simply play your game in the editor as normal, and it will pause execution at your breakpoints.
Fun fact: Unity allows for executable builds of your game that can connect to a debugger on startup. It can feel surreal that this works when debugging a game running on a Nintendo Switch development kit!
4. Structuring games with the MVC framework
For the purpose of this article, I attempt to separate the components in a way that represents the MVC Framework (Model, View, Controller). This approach is a design philosophy which distinguishes between these elements:
Model: data is gathered and processed.
View: data is presented to the user.
Controller: manipulates the model, which updates the view.
I approach the software architecture of my games using a model similar to MVC. In our example, I actually wrote these components:
An input system
A component for physics events
The player component to manage coin count
I’m a fan of building components in ways that protect the ‘model’ of the game, allowing for external controls like keyboard inputs to manipulate it. I interface UI components with the data in the model. I sometimes also find it fun to express the data model in novel ways through visual and audio effects, or music.
As a fun fact, when I first met Gergely almost a decade ago, I was working on mobile applications. Building mobile applications involved working regularly with mobile MVC frameworks. I’ve found it valuable for structuring game projects in line with the MVC approach.
Following MVC principles ensures you can easily debug the logic of the game to separate it from its visual representation and the mechanisms that manipulate it. It defeats the purpose of how game engines are built if you lump all your game logic in one large C# class, and attach it to the player avatar.
5. Leaning on your skillset
Even though we’ve built a coin collection game, I somehow doubt I’ve convinced many readers to drop successful careers as software engineers to become game developers.
Still, you may be curious to try your hand at game development. For this, I provide a list of resources at the foot of this article to help you get started. I’ll close with an observation from having spent more than 10 years in the game development industry.
Having a background in “traditional” software engineering is a huge benefit for a game developer. Writing in a game engine requires writing code that doesn’t conform to ‘traditional’ approaches. Sure, you use object-oriented languages, but often in ways that butcher the principles of the object-oriented paradigm in order to service the needs of the engine.
The game engine pushes away from ‘good’ programming practices and operates in its own unique way. You have to rethink how to approach implementing a feature to fit the game engine’s environment. Building games frequently means breaking good programming practices because you learn how to write the language in service of the game engine.
Once you have something that works, you need to optimise it for performance on different platforms. Is the frame rate consistent? What about when it’s deployed on different hardware benchmarks for a PC release, ranging from dozens of graphics cards, to portable PC platforms like the SteamDeck? How does it perform on PlayStation or Xbox?
Once you have the game running on a platform, you still need to integrate system-level features. Can you placate a platform holder (hardware manufacturers like Sony and Nintendo) by satisfying their service requirements?
To solve these challenges you need to rely on your technical proficiency as a programmer. You need to not only understand how the engine works, but also have a rich appreciation of programming language(s), how these interface with the engine, and how they execute on the hardware.
Software engineering principles at the deep technical level are important for game developers to master. When I taught game development at universities, I aimed to ensure we taught these ‘core’ principles, and disconnected them from the creation of games. It’s an argument I sometimes won and sometimes lost.
Some university department managers sought to avoid focusing too much on deep principles because these topics are more technical and more challenging than just teaching game development. Teaching challenging topics could have meant our university scored lower in student evaluations, meaning the university would be less attractive to prospective students, than if we focused on ‘easier’ stuff.
But without teaching difficult basics, we’d wind up with students who were ‘Unity developers’ or ‘Unreal developers,’ but lacked a richer technical understanding. Without it, they would struggle to adapt to a new game engine, not to mention that they’d have little to fall back on when developing a new feature for a proprietary engine.
Being a competent, technically proficient software engineer is a skillset that easily transfers to games development. All you need is time and practice to better understand the minutiae of game engines!
6. Getting started
So you’re wondering how to get started? I’ve included links to a wealth of written and video resources for both Unity and Unreal engines. Both engines are free to download and you can quickly get started.
Unity:
Unity Learn: Unity’s own platform, complete with tutorials on how to get started.
Manual: Helps you get to grips with the editor and core aspects of the engine.
API: An overview of the API itself.
Unreal: another popular engine. See the ‘Getting started’ section on the official website.
Content Creators: A lot of tutorials nowadays are video based, and I have met and worked with some creators in recent years. Here’s some recommendations.
Brackeys: While this channel has been inactive for two years, Brackets set a standard for presenting and teaching game development in the Unity engine.
Game Dev Guide: Hosted by my friend Matt Gambell, whom I met during my early game development days. Matt often explores game development concepts in very specific areas, but nonetheless presents very interesting, exciting videos.
Samyam: Sam does a great job of communicating the inner workings of specific areas of Unity, including more recent features, as well as doing some anarchic stuff.
Meetups: there are game developer communities that host regular weekly or monthly meetups. They’re useful ways to meet others who share similar passions and interests. I’ve visited events where I’ve had hobby programmers and students to my left, and devs who work at local AAA studios to my right.
Game jams are essentially hackathons for games. There’s a theme and a limited timeframe in which to build a game. Simple! I’ve participated in and hosted several game jams over the years. I find them a fantastic way to learn new game development tools and techniques. Plus, you get to engage with like-minded developers.
In fact, I’m hosting my third annual AI and Games jam, which lasts one week, starting 15th September. The goal is to make a game in seven days that employs some form of AI in its development. You’re more than welcome to participate, and we host a special area of the ‘AI and Games’ Discord server to support our jammers throughout.
It has never been easier to try your hand at making games. The landscape continues to change in ways which make game development ever-easier and more accessible. Sure, our coin collecting game won’t set the world alight. But this small project is a mere stepping stone to something larger and more complex!
Takeaways
This is Gergely again. Thanks a lot Tommy for this interesting walkthrough. Of course, it was only possible to scratch the surface of game development in a single article, so if you’re interested in going deeper, I suggest subscribing to his newsletter: AI and Games , and checking out his excellent YouTube channel: AI and Games.
I followed along and built my first “game” using Unity. It was surprisingly easy, even if the interface feels pretty overwhelming at first. The similarities and differences to more ‘traditional’ software engineering are interesting.
Game development has a steep learning curve, initially. I’m no stranger to coding, but the concepts of GameObject, Scene, and Prefab were all new to me, and there’s plenty else to get to grips with. However, the underlying concepts of how objects communicate with each other, based on OO concepts – even ‘butchered’ ones – are the same as in software engineering.
It’s amusing to see how much games can “hide” language fundamentals. Even in this case, C# is used in a way that goes against the language, by defining methods that override a parent method, but without the accompanying keyword. The Unity engine does a bunch of ‘magic’ behind the scenes – the magic is reflection – so I can see how game developers writing C# would write very different C# code from the rest of the industry.
The game development life cycle also feels a lot less “traditional,” where you build a service and then maintain it. For example, with a SaaS offering, building the first version takes less time, and adding new features and maintaining the service is the majority of time and effort. In contrast, building a game is the major effort, and then maintaining it is a relatively minor one. So it’s no surprise that approaches for game development and ‘traditional’ software development seem different.
I hope you enjoyed this rather different issue, and perhaps feel inspired to build your own game, one day!
How did you like this issue? 🤔
 | A guest post by
|
Really great tutorial. This is the first time I made it through a Unity tutorial and everything worked! Thanks for putting this out there, super helpful!